Every booking goes through three stages: the guest's request, the notification to you, and your decision to confirm or cancel. The system sends automatic emails at each stage.
Stage 1 — The guest submits a request
The guest visits your booking page, selects dates, the number of guests and optional services (parking, pet, etc.), enters their details and clicks "Send request".
At this point:
- The booking lands in your panel with the status Pending.
- You receive a notification email with the guest's details and the dates.
- If you have Telegram connected — you also get a push notification on your phone.
- The guest sees a confirmation page noting that your account will be in touch.
Availability calendar on the guest page
Before choosing dates, on your booking page the guest sees an "Availability" section — a calendar of the next three months. Each day is colour-coded:
- Available — the date is free and can be booked.
- Occupied — the date is taken by a confirmed booking, a manual block, or a date imported from Booking.com or Airbnb via iCal.
- Past days are greyed out and can't be selected.
The calendar updates automatically — you don't need to set anything up. The guest immediately sees which dates are gone before filling in the form. It's the same availability picture you have in the panel Calendar.
Stage 2 — You review the request in the panel
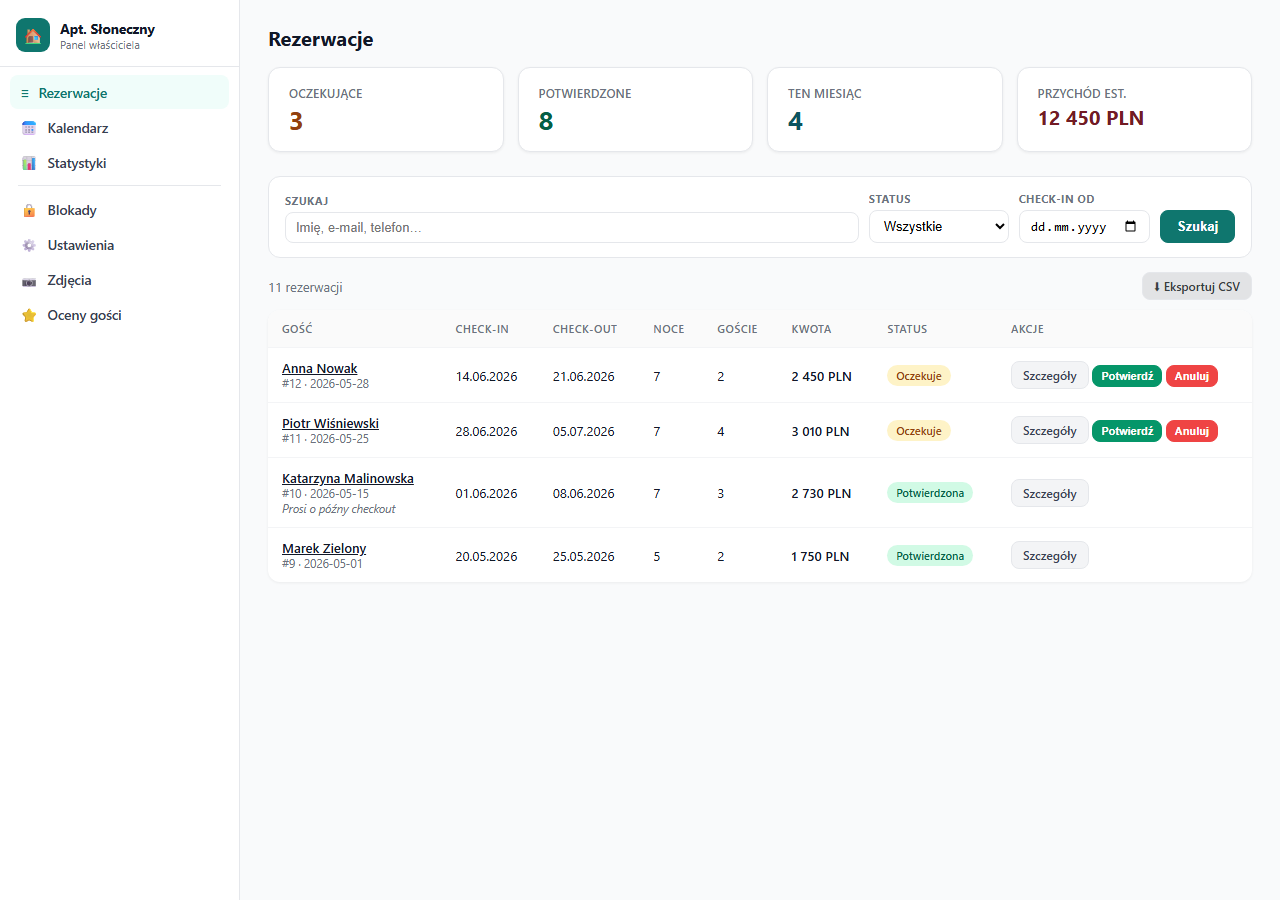
In the Bookings section you'll see a new entry with an orange "Pending" label. The pending counter in the top statistics section increases.
Click the guest's name or "Details" to open the booking page with the full details: name, email, phone, dates, number of nights, price calculation and the message from the guest.
Stage 3 — You confirm or cancel
On the booking details page (or directly from the list) click:
- "✓ Confirm booking" — the status changes to Confirmed, the guest automatically receives a confirmation email with the stay details and check-in instructions.
- "✕ Cancel booking" — the status changes to Cancelled, the guest receives an email about the cancellation.
Variant with online payment
The flow above is the default request mode. If you configure online payments (Settings → Payments), the guest pays through the gateway right away instead of sending a request — and the booking is confirmed automatically once the payment is recorded, without your decision from stage 3.
Automatic emails
| Event | Recipient | Content |
|---|---|---|
| Request submitted | Owner | Guest details, dates, amount |
| Request submitted | Guest | Confirmation that the request was received |
| Confirmation | Guest | Booking confirmation + check-in instructions (if set) |
| Cancellation | Guest | Information about the cancellation |
| Date/guest change | Guest | Information about the booking change |
| Arrival day | Guest | Check-in instructions (in the morning, around 9:00) |
Event history
On each booking's details page, the right column shows an Event history — a chronological log of all actions: submission, status change, sent emails, messages to the guest, saved notes. Useful when you want to check when and what happened.
Response time
The system doesn't require a response within a set time, but best practice is to confirm or reject within 24 hours. A longer wait lowers guest trust — especially when they're also considering offers on Booking.com.
Adding bookings manually
If a guest contacted you outside the form (phone, WhatsApp, a Booking.com message), you can enter the booking directly in the panel. Details: Manual booking by the owner.
Related articles: Confirming and cancelling · Editing a booking · Manual booking by the owner · How the availability calendar works · Message to the guest · Messages from a guest (contact form) · Which emails the guest receives · How online payments work