Photos are the most important element of a booking page: a guest looks first, reads second. The Photos section is available directly from the panel's left menu.
How to upload photos
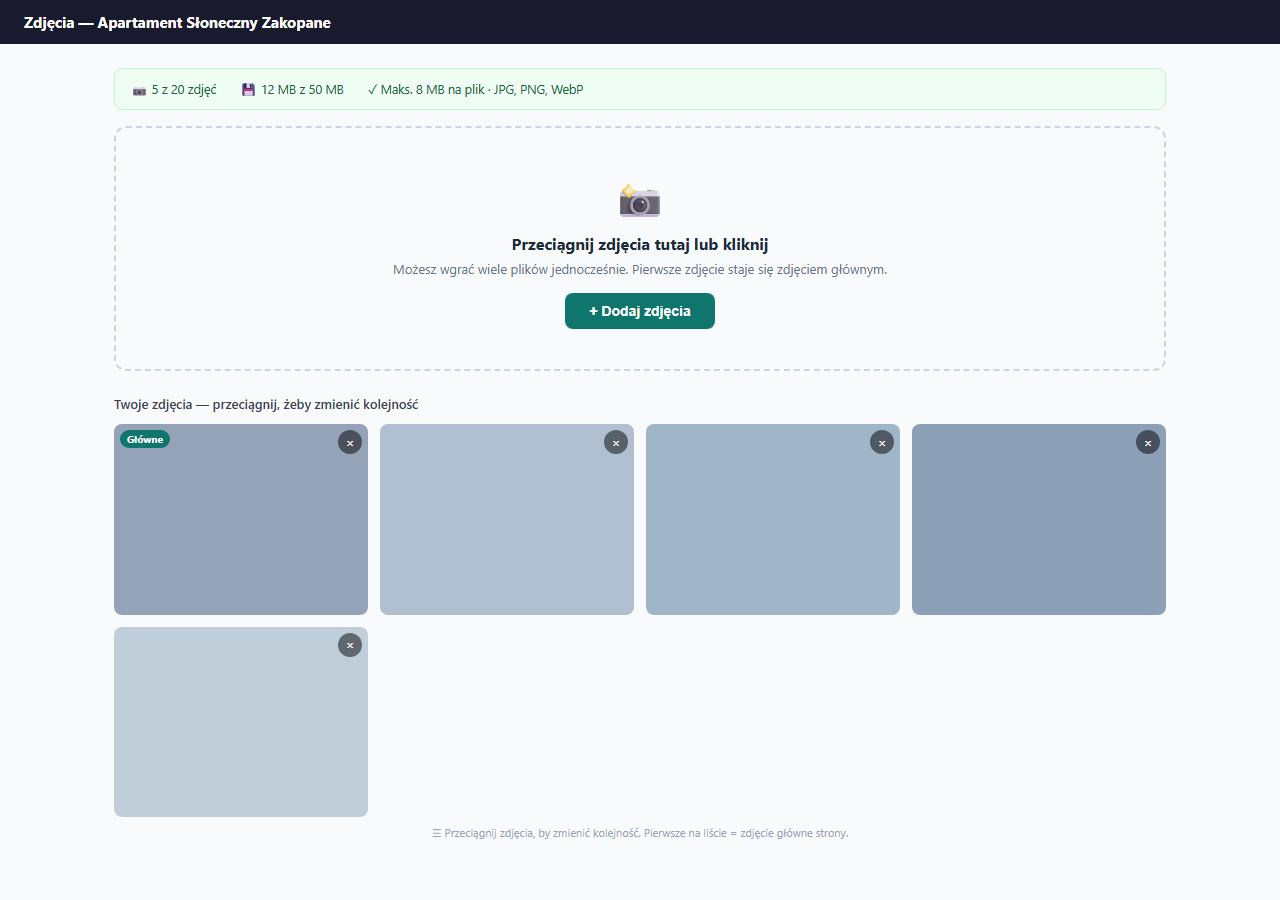
Drag files straight into the "Drag photos here" area, or click "click to choose". You can select multiple files at once. You'll see a preview of the selected photos; check it and click "Upload" to send them to the server. A progress bar shows the upload status.
Limits
- A maximum of 20 photos per apartment
- A maximum of 8 MB per file
- A total maximum of 50 MB for the whole apartment
- Supported formats: JPG, PNG, WebP and HEIC (the default photo format on iPhone)
HEIC photos from an iPhone are converted to JPG automatically in your browser, before they're sent: you don't need to change anything on your phone or convert files by hand.
Automatic photo compression
Photos from a phone or camera often weigh several MB each, which makes the booking page load slower, hurting the guest experience and lowering the page's performance scores in Google. That's why, on upload, erphome.pl compresses photos by default: it shrinks the dimensions to a maximum of 2400 px on the longer side and re-compresses the file, while also fixing the orientation (phone photos won't end up sideways).
Compression applies only to newly uploaded photos: already uploaded ones stay unchanged. Thanks to it, you usually don't need to shrink photos before upload.
You'll find the "Compress photos on upload" toggle in Settings → Apartment → the "Gallery, rules and area" card. Leave it on unless you have a specific reason to turn it off, e.g. you're uploading photos that are already optimized. When it's off, photos are saved at their original size.
If you turn compression off and photos are too large, shrink them before upload with a tool like Squoosh (free, online). 80% quality when exporting to WebP gives files 3–5× smaller with no visible loss.
iPhone photos (HEIC)
By default, an iPhone saves photos in HEIC format. You don't need to change anything: upload them normally and the panel converts them to JPG in the browser before sending. Conversion takes a moment; you'll see the message "Converting HEIC photos from iPhone to JPG…".
If the conversion fails (e.g. JavaScript is disabled), change the camera format on your phone: Settings → Camera → Formats → "Most Compatible" (JPEG) and upload the photo again.
Compression on upload
By default erphome.pl compresses photos on upload: it reduces the dimensions (max 2400 px on the longer side) and lightly re-compresses files, which noticeably speeds up loading of the booking page with no visible quality loss. It applies only to newly uploaded photos and doesn't change ones already uploaded.
You'll find the setting in Settings → Apartment as "Compress photos on upload". Uncheck it only if you need the original photos at full resolution, remember then the 8 MB per file and 50 MB total limits.
If your photos are very large and you turned compression off, shrink them before upload with a tool like Squoosh (free, online). 80% quality when exporting to WebP gives files 3–5× smaller with no visible loss.
Order and main photo
You set the photo order yourself: drag the ⠿ handle in the top-right corner of a tile in the photo list to its target position. The change saves automatically, without reloading the page.
The first photo in that order acts as the main photo:
- the large photo at the top of the booking page
- the apartment thumbnail in the catalog (when you have several properties)
- the Open Graph image (when a guest shares the link)
The panel marks the first five photos with "Gallery #1", "#2" etc. labels: these are the photos that make up the visible gallery preview on the page (in the Mosaic and Grid styles). So put your best shots first. The remaining photos don't disappear: a guest opens them with the "Show all photos" button in the enlarged view (lightbox).
Deleting photos
Click ✕ in the corner of a photo, confirm: the photo is permanently deleted. If you delete the main photo, the next one in order takes over its role.
Photo captions
Each photo can have a short text caption visible to guests in the lightbox (after clicking the enlarged photo).
Click the "Photo caption..." field below the thumbnail and enter text, e.g. "Living room with a fireplace and a view of the Tatras" or "Kitchen equipped for 6 people". The caption saves automatically after you leave the field, without reloading the page (a ✓ appears next to the photo).
The caption is optional. Photos without a caption display normally: the only difference is no text in the lightbox.
- Maximum caption length: 200 characters.
- The caption applies to a specific file: if you replace a photo with a new file, the caption must be entered again.
Gallery style
You set the gallery style in Settings → Apartment → the "Gallery, rules and area" card.
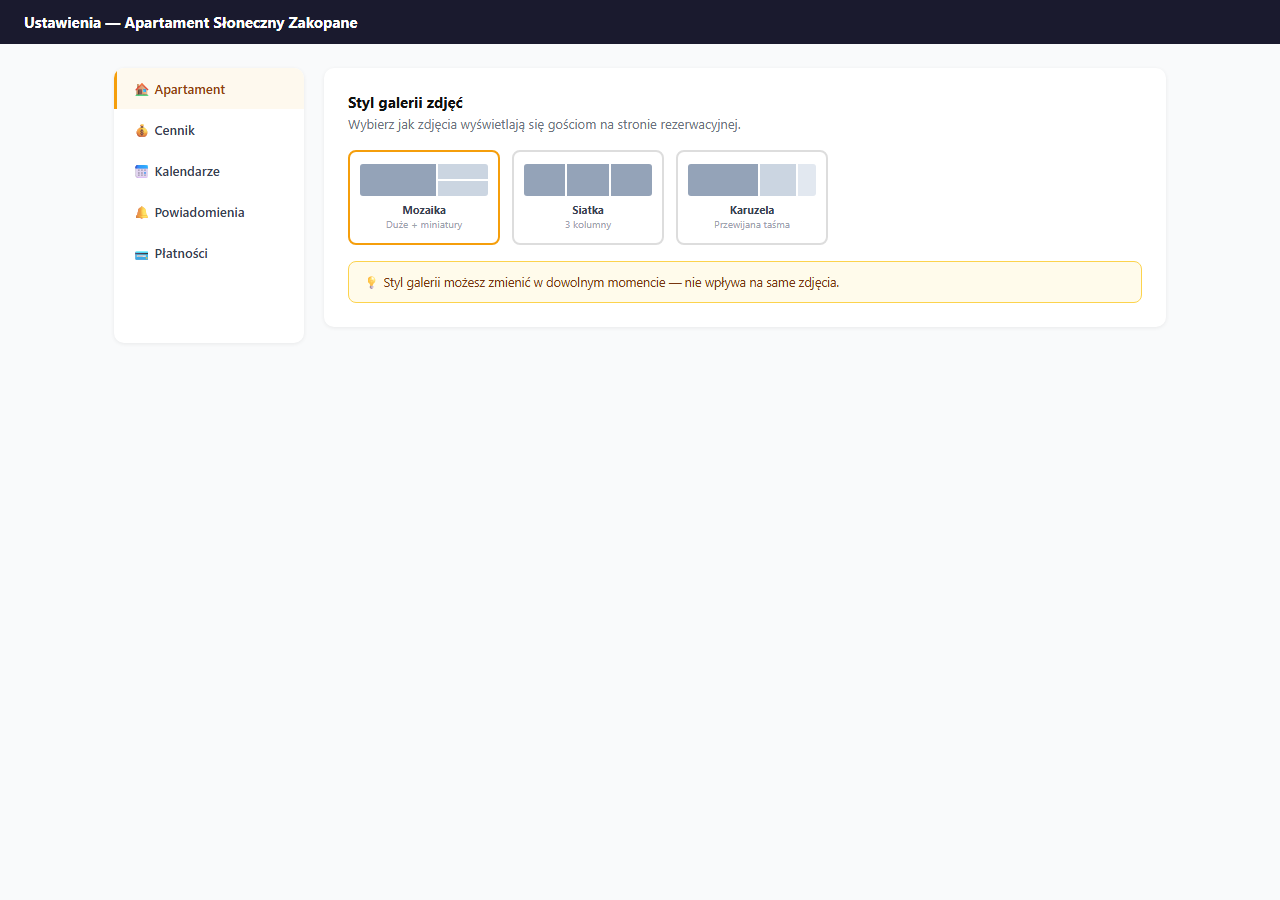
Three styles are available:
| Style | Look | When to use |
|---|---|---|
| Mosaic (default) | Large main photo + 4 thumbnails beside it (first 5) | When you have one exceptionally good main photo |
| Grid | Tiles in an even grid (up to 6 visible) | When all photos are equally good |
| Carousel | A scrollable strip with all photos | When there are few photos (3–5) |
In the Mosaic and Grid styles a "Show all photos (N)" button appears below the preview when there are more photos than the preview fits. Changing the gallery style doesn't affect the photos themselves or their order: you can change it freely.
Photo tips
- Take photos in natural daylight: artificial lighting gives yellow tones.
- Minimum recommended resolution: 1600×1200 px.
- Order: first the living room/main space, then bedroom, bathroom, kitchen, window view, surroundings.
- Avoid photos with people: guests want to see the space, not previous guests.
Frequently asked questions
How many photos and how large can the files be?
A maximum of 20 photos per apartment, up to 8 MB per file and 50 MB total. Supported formats are JPG, PNG, WebP and HEIC. The default compression on upload (down to 2400 px) usually keeps phone photos within these limits.
Do I need to convert iPhone (HEIC) photos?
No. The panel converts HEIC to JPG in the browser before sending. If the conversion fails, change your camera format on the phone to "Most Compatible" (JPEG) and upload again.
How do I set the main photo?
The main photo is the first one in the gallery order. Drag the ⠿ handle in a tile's corner to reorder: the change saves right away. The main photo goes to the top of the page, the catalog thumbnail and the Open Graph image when the link is shared.
Related articles: Basic information (title, description, address) · Personalization: gallery style, color, emoji · Apartment catalog · How to share your page